1. Equipment
You will need a stamp, an ink pad, some card to stamp onto and a few promarkers. I bought 10 markers to start with in colours that I thought I would need the most. Theres a huge range of colours to choose from.
The type of card you choose to stamp onto is really important, anything shiny or glossy and the ink will rub off. At the same time some card/paper is too absorbent- I tried to use promarkers on a sheet of handmade paper from a craft shop and the ink spread outside of the lines of the stamp and went really blotchy. Normal paper and card without a glossy finish work fine but I like using scraps of linen card- it stamps and colours really easily and looks professional.
 |
| The stamp I'm using was a freebie from Quick Cards magazine |
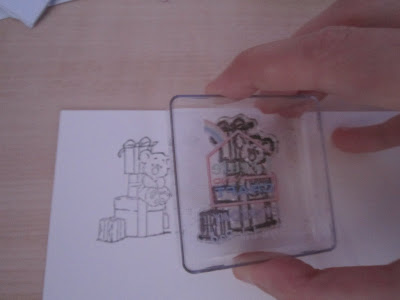
Peel your stamp off the protective backing that it comes with and attach to a clear acrylic block - Note- This is what the instructions on packets of stamps tell you to do, I didn't have any acrylic block so for small stamps, I place them on the lid from my ink pad, they usually stick to it naturally and this works just as well as a clear block. For larger stamps you can use a clear CD or DVD cover.
Ink up your stamp and press firmly onto your card or paper then lift it off carefully so you don't smudge the ink.
3. Colouring
Finally, the fun bit! :) Promarkers have 2 ends, the fat end for colouring larger areas and the pointy end for smaller areas and detailed bits. Colour your stamp in small strokes, always going in the same direction or your stamp ends up with streaks like a bad fake tan! Colour in the sections that use lighter colours first- if you go over the lines into another section no one will notice if you put a darker colour over the top. If you do this the other way round its very noticible... Trust me on that one lol.
 |
| Lightest colours first, that way its much easier to fix mistakes |
And there you have it! All done =) If you go over the lines of the stamp- very easily done until you have had some practise- like I have on the bottom present (on purpose to demonstrate... *ahem*) you can cut out the stamp and no one will ever know.
I hope this has been helpful and actually made sense. I haven't decided what to do with my newly coloured in koala yet but he will probably feature on a card very soon!
Bye for now
Hayley x


No comments:
Post a Comment